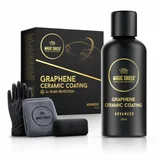
A complete coating kit for a deep gloss, slick surface, and durable water-beading protection.
Before you start
Clean, dry, decontaminated paint
15–24°C surface temperature
Ventilation, gloves and clean microfiber towels
Work on cool panels, out of direct sunlight. Have your towels ready before you start: excess coating needs to be buffed off after flashing.
Step by step
Wash and prepare
Wash thoroughly and remove bonded contamination. Polish only if needed, then use Prep Spray following its wipe-and-rinse directions. Let the surface dry completely.
Shake and load
Shake well. Add 6–10 drops to the suede applicator and keep it moist with a few more drops every 2–3 swipes.
Apply evenly
Use straight, overlapping passes across one small section at a time.
Flash, then buff
Allow 3–5 minutes for a light rainbow haze to appear; temperature affects timing. Buff promptly with a clean microfiber towel, then inspect the finish from several angles.
Keep your kit’s printed instructions nearby. If your label or manual differs from this guide, contact us before applying.
Coat / Product guide
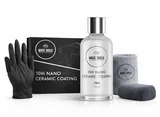
Ceramic Coating PRO 10H
A ceramic coating for clean, prepared automotive paint.
Before you start
Clean, dry, decontaminated paint
15–24°C surface temperature
Ventilation, gloves and clean microfiber towels
Work on cool panels, out of direct sunlight. Have your towels ready before you start: excess coating needs to be buffed off after flashing.
Step by step
Prepare the paint
Wash thoroughly and remove bonded contamination. Polish only if needed, then use Prep Spray following its wipe-and-rinse directions. Let the surface dry completely.
Shake and load
Shake well. Add 6–10 drops to the suede applicator and keep it moist with a few more drops every 2–3 swipes.
Coat a small section
Spread a thin, even layer in straight, overlapping passes, working one section at a time.
Flash, then buff
Allow 3–5 minutes for a light rainbow haze to appear; temperature affects timing. Buff promptly with a clean microfiber towel and inspect from several angles.
Keep your kit’s printed instructions nearby. If your label or manual differs from this guide, contact us before applying.
Restore & coat / Product guide
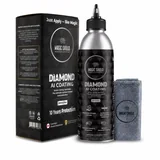
Diamond AI Coating
A self-leveling coating for used paint that needs gloss restoration without a conventional buff-off step.
Before you start
Prepared, completely dry paint
Fully saturated applicator
Ventilated indoor space, gloves and good lighting
Do not buff Diamond AI. Use on painted surfaces or headlight plastic only, never the front windshield. Wait at least 6 months after repainting.
Step by step
Prepare the surface
Wash thoroughly, remove contamination, then remove wax, grease and residue. Make sure the surface is completely dry before application.
Saturate the applicator
Shake the bottle. Fully saturate the applicator cloth with approximately 80–100 drops before the first use. Add 10–15 drops for each subsequent panel.
Apply in one direction
Apply slowly in a single, straight direction with only 5–10% overlap between strokes. Keep the applicator wet enough to avoid dragging.
Let it self-level
Do not buff the coating. Inspect each treated area within 15 minutes and correct imperfections immediately with prep spray or degreaser, following the kit instructions.
Keep your kit’s printed instructions nearby. If your label or manual differs from this guide, contact us before applying.
Maintain / Product guide
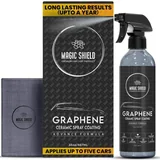
Graphene Ceramic Spray
A spray-and-wipe protection step for clean automotive paint.
Before you start
Cool, clean, dry surface
Clean microfiber towels
Shade and good ventilation
Buff immediately, within 60 seconds. Do not let the spray dry on the panel or apply it in direct sunlight.
Step by step
Wash and dry
Remove dirt and grit before application. Work in shade on a surface that is dry and cool to the touch.
Shake and mist
Shake well. Hold the bottle 15–20 cm (6–8 inches) away and spray a light, even coat onto a small section.
Buff immediately
Use a clean microfiber towel to spread and buff the surface within 60 seconds. Work promptly to prevent excessive haze.
Repeat in small sections
Finish each section before moving on. Turn to a clean towel face and inspect for an even, clear finish.
Keep your kit’s printed instructions nearby. If your label or manual differs from this guide, contact us before applying.
Interior / Product guide
Leather Graphene Coating
Protection for clean, finished automotive leather.
Before you start
Finished smooth leather
Hidden-area compatibility test
Fully dry surface, ventilation and gloves
Use on finished, smooth leather and test a hidden area first. The coating does not repair peeling or torn leather.
Step by step
Check the surface
Test a hidden area first. Do not use this guide for suede, nubuck, Alcantara or unfinished leather.
Clean and dry
Clean the leather with Magic Shield Leather Cleaner, removing oils and residue. Allow it to dry completely.
Apply a thin coat
Shake the coating well. Add a few drops to the applicator and spread a thin, even layer over one small section.
Wait 30–60 seconds, then buff
Let the coating sit for 30–60 seconds; cooler temperatures may need longer. Gently buff away excess with a clean, dry microfiber towel using light circular motions.
Keep your kit’s printed instructions nearby. If your label or manual differs from this guide, contact us before applying.
Clean & maintain / Product guide
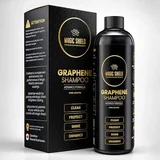
Graphene Shampoo
A concentrated maintenance wash designed to clean safely while supporting gloss and hydrophobic behavior.
Before you start
Cool panels out of direct sunlight
Wash bucket and clean wash mitt
Rinse water and soft drying towel
The 30 mL to 4 L mix below is for a wash bucket. For foam-cannon dilution, follow the directions supplied with your bottle and equipment.
Step by step
Pre-rinse
Rinse thoroughly to remove loose dirt and debris before touching the paint.
Mix the bucket wash
Mix 30 mL of shampoo with 4 litres of water in a clean wash bucket.
Wash from top to bottom
Use a clean wash mitt or sponge. Rinse the mitt frequently and keep heavily soiled areas separate.
Rinse thoroughly
Remove all soap residue with clean water. Do not allow the shampoo to dry on the vehicle.
Dry the vehicle
Use a clean, soft microfiber drying towel to help prevent water spots.
Keep your kit’s printed instructions nearby. If your label or manual differs from this guide, contact us before applying.
Decontaminate / Product guide
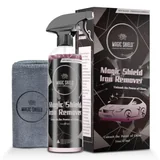
Iron Remover
A chemical decontamination step for paint and wheels before clay, polishing, or coating.
Before you start
Cool surface out of direct sunlight
Water ready for rinsing
Gloves, eye protection and ventilation
Keep away from polycarbonate headlights, clear-bra/paint-protection film and sensitive plastics. Never let Iron Remover dry on the surface.
Step by step
Prepare and test
Remove loose dirt and test a small, inconspicuous area before full application.
Shake and spray
Shake well. Spray evenly over the affected area for full coverage.
Allow a short wet dwell
Allow approximately 4–5 minutes. Keep the product wet and rinse sooner if it starts to dry.
Agitate gently if needed
Use a clean wash mitt or soft sponge to loosen stubborn contamination without scrubbing aggressively.
Rinse completely
Thoroughly rinse away the product and dissolved contamination with clean water.
Keep your kit’s printed instructions nearby. If your label or manual differs from this guide, contact us before applying.
Decontaminate / Product guide
Clay Bar Kit
A mechanical decontamination step for rough paint after washing and chemical iron removal.
Before you start
Freshly washed vehicle
Plenty of clay lubricant
Clean clay and a small test section
Keep the panel and clay lubricated. If the clay falls on the ground, discard it.
Step by step
Wash first
Remove loose dirt. Clay only where bonded contamination remains after cleaning.
Knead and test
Flatten a clean piece of clay to expose a fresh working face. Start with a small test section.
Lubricate generously
Shake the clay lubricant and mist generously over a small section. Keep the panel and clay wet throughout.
Glide lightly
Use light pressure and straight passes until the surface feels smooth. Add more lubricant if the clay starts to drag.
Fold and wipe
Expose a clean clay face often. Wipe lubricant residue with a clean microfiber towel and inspect the paint.
Store clean clay
Keep reusable clay slightly moist, wrap it after use and store it airtight in a cool place. Discard clay immediately if dropped on the ground.
Keep your kit’s printed instructions nearby. If your label or manual differs from this guide, contact us before applying.
Correct / Product guide
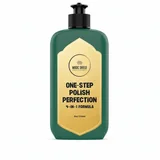
One Step Polish
A correction step for oxidation, haze, and light defects before the final prep wipe and coating.
Before you start
Clean, dry, decontaminated paint
Foam polishing pad and clean microfiber towels
A small test spot and good lighting
Keep the pad clean, avoid sharp edges and thin paint, and stop if the panel becomes hot. Deep scratches or failing paint need repair.
Step by step
Prepare the paint
Wash and dry thoroughly. Remove bonded contamination and protect sensitive trim before polishing.
Shake and test
Shake the bottle well. Start with a small test spot and a small amount of polish on a foam pad.
Polish the section
By hand, use circular, overlapping motions with light pressure. With a machine, spread at low speed, then work the polish following the polisher and pad instructions.
Buff and inspect
Remove residue promptly with a clean microfiber towel. Turn the towel frequently, then check the finish for missed or uneven areas.
Prep before coating
Remove remaining polishing oils with Prep Spray, following its wipe-and-rinse directions. Let the surface dry completely before applying a coating.
Keep your kit’s printed instructions nearby. If your label or manual differs from this guide, contact us before applying.
Prep / Product guide
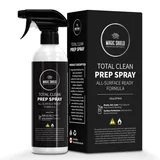
Prep Spray
Remove polishing oils, fingerprints and residue before applying your coating.
Before you start
Washed, dry, cool surface
Clean microfiber towels and rinse water
Ventilation; keep away from heat and flame
Keep away from heat, sparks and flames, and work with good ventilation. Follow the wipe-and-rinse method on the label.
Step by step
Finish cleaning and correction
Wash the vehicle and complete any polishing first. Remove visible residue and let the surface dry.
Shake and spray
Shake well. Apply Prep Spray generously to one small section of the cool, shaded surface.
Wipe and rinse
Wipe back and forth with a clean, lint-free microfiber towel. Rinse off remaining residue.
Repeat and inspect
Work section by section, then use a fresh microfiber towel for a final wipe. Make sure all residue is gone.
Dry before coating
Allow the surface to dry completely before applying your coating.
Keep your kit’s printed instructions nearby. If your label or manual differs from this guide, contact us before applying.
Graphene ceramic coating performs best when the paint is clean, decontaminated, and properly prepared. Follow the product instructions and work methodically, one section at a time.
01 / PREPARE
Build a clean foundation
Wash thoroughly, remove bonded contamination, and polish only if the finish needs correction.
02 / APPLY
Coat in controlled sections
Use a clean applicator, follow the included directions, and avoid rushing across large areas.
03 / MAINTAIN
Protect the result
Allow the coating to cure as directed, then use coating-safe wash and maintenance products.
A strong choice for
Owners who want a high-gloss protected finish
Properly washed and prepared surfaces
DIY detailers who can follow a step-by-step process